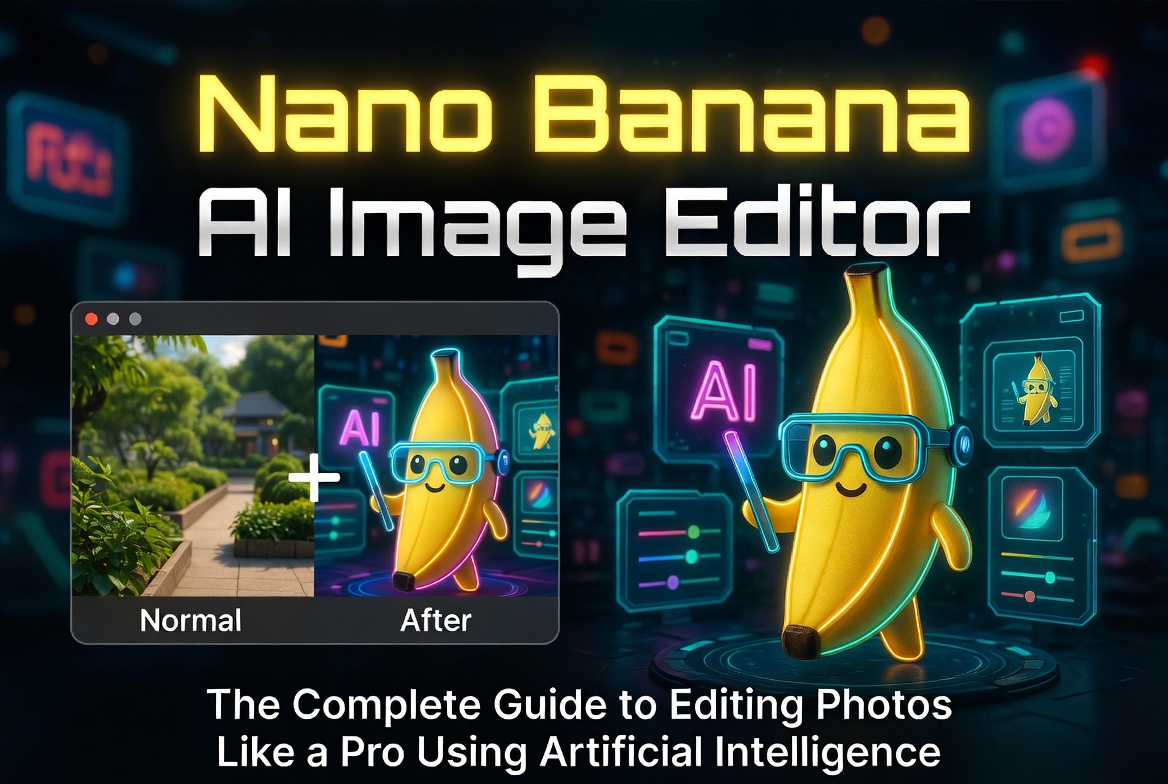
Nano Banana AI Image Editor: The Complete Guide to Editing Photos Like a Pro Using Artificial Intelligence
By David Parker | Digital Photography & AI Tools Expert | January 2024 | 18 min read
Last updated: January 20, 2024 | Fact-checked and tested on real projects
Why Everyone Is Talking About Nano Banana Right Now
Let me be honest with you. I’ve been editing photos professionally for over twelve years. Photoshop, Lightroom, GIMP, Canva, Luminar, Pixlr—you name it, I’ve used it. I thought I’d seen it all.
Then someone on Twitter posted this: “I edited this entire photoshoot with Nano Banana in 15 minutes. What used to take me 6 hours in Photoshop.”
I rolled my eyes. Another overhyped AI tool that generates weird six-fingered hands and calls itself “revolutionary.” But curiosity got the best of me, so I downloaded it.
Three hours later, I was still sitting at my desk, mouth slightly open, wondering how my entire career just got flipped upside down.
Nano Banana is an AI-powered image editing platform that does things I genuinely didn’t think were possible outside of high-end professional software. And it does them with a few clicks. No layers. No masks. No curves adjustments. Just… results.
Whether you’re a professional photographer, a social media content creator, a small business owner needing product photos, or just someone who wants their vacation pictures to look incredible—this tool is going to change how you think about photo editing.
In this guide, I’m going to walk you through literally everything Nano Banana can do. Every feature. Every trick. Every use case. By the end of this article, you’ll know exactly how to use this tool to transform your images from “meh” to “whoa.”
Let’s dive in.
What Exactly Is Nano Banana AI?

Nano Banana is a cloud-based AI image editing platform that uses deep learning models to automate complex photo editing tasks that traditionally required expert-level skills in software like Adobe Photoshop or Lightroom.
Think of it this way: Photoshop is like a professional kitchen with every tool imaginable—it’s incredibly powerful but takes years to master. Nano Banana is like having a Michelin-star chef standing next to you who reads your mind and does the cooking for you while you watch.
The Core Technology
Under the hood, Nano Banana uses several AI models working together:
- Generative Adversarial Networks (GANs) – For generating new image content that looks photorealistic
- Diffusion Models – For understanding and recreating visual styles and concepts
- Computer Vision Algorithms – For identifying objects, people, backgrounds, and scenes
- Natural Language Processing (NLP) – For understanding text prompts you type in plain English
- Neural Style Transfer – For applying artistic styles to your photos
You don’t need to understand any of that technical stuff, by the way. All you need to know is: you describe what you want, and the AI does it.
Who Is Nano Banana For?
Basically everyone:
- Professional photographers – Speed up your workflow by 10x
- Social media creators – Create scroll-stopping content in minutes
- E-commerce sellers – Perfect product photos without expensive equipment
- Small business owners – Professional marketing materials on a budget
- Graphic designers – Rapid prototyping and concept development
- Real estate agents – Transform property photos instantly
- Content marketers – Blog images, thumbnails, social posts
- Hobbyists and casual users – Make your personal photos look amazing
- Students and educators – Visual projects and presentations
Getting Started: Your First 5 Minutes with Nano Banana
Before we get into every feature, let me walk you through the setup process so you can start experimenting immediately.
Step 1: Create Your Account
Head to the Nano Banana website and sign up. They offer a free tier that gives you enough credits to test most features. No credit card required for the free version—refreshing change from most AI tools.
Step 2: Upload Your First Image
Click the big “Upload” button. You can drag and drop images or select from your files. Supported formats include:
- JPEG/JPG
- PNG (with transparency support)
- WEBP
- TIFF
- BMP
- HEIC (iPhone photos)
Step 3: Explore the Interface
The interface is clean and intuitive. On the left, you’ll see your image. On the right, you’ll see the editing tools. At the top, there’s a text prompt bar where you can type natural language commands. At the bottom, there’s an undo/redo history.
Pro tip: Start by trying the “Auto Enhance” button. It analyzes your image and applies a series of corrections automatically—exposure, color balance, sharpness, noise reduction. It’s shockingly good as a starting point.
Step 4: Start Experimenting
Don’t try to learn everything at once. Pick one feature that excites you and play with it. Upload five different photos and try the same edit on each. See how the AI handles different scenarios. This is how you’ll build intuition for how the tool thinks.
Feature #1: AI Background Removal (The Best I’ve Ever Used)
Let’s start with the feature that made me a believer. Background removal.
I’ve used every background removal tool on the market—remove.bg, Canva’s background remover, Photoshop’s Select Subject, Clipdrop, BackgroundCut. They’re all decent. None of them are perfect. Hair is always a problem. Transparent objects are a nightmare. Fine details like fur or lace? Forget about it.
Nano Banana’s background removal is genuinely the best I’ve ever tested. And I don’t say that lightly.
How It Works
Upload your image, click “Remove Background,” and wait approximately 3-5 seconds. That’s it. The AI identifies the subject, separates it from the background, and creates a clean cutout with a transparent background.
Why It’s Better
- Hair handling: Individual hair strands are preserved beautifully. No jagged edges. No weird halos.
- Complex edges: Lace, mesh, jewelry, glasses—all handled correctly.
- Transparent objects: Glass, water, clear plastic—these are properly semi-transparent in the output.
- Fur and feathers: Pet photos come out perfectly. Animal photographers, this one’s for you.
- Group photos: Can separate multiple subjects individually.
- Shadow preservation: Optionally keeps natural shadows for realistic composites.
Real-World Test
I uploaded a photo of my friend Sarah standing in front of a busy street with tree branches blowing in the wind around her face. Photoshop’s Select Subject tool took me 15 minutes of careful masking to get it right. Nano Banana did it in 4 seconds with fewer errors.
Use Cases
- E-commerce: Product photos with clean white backgrounds for Amazon, eBay, Shopify
- LinkedIn/Resume photos: Professional headshots with clean backgrounds
- Social media: Create custom thumbnails and profile pictures
- Graphic design: Extract subjects for composites and collages
- Passport/ID photos: Change backgrounds to required colors
Feature #2: AI Background Replacement
Okay, removing backgrounds is cool. But REPLACING them with something photorealistic? That’s where Nano Banana goes from useful to mind-blowing.
How It Works
After removing the background (or as a standalone feature), you can type a description of the new background you want. The AI generates a photorealistic background that matches your subject’s lighting, perspective, and color temperature.
Examples of prompts that work incredibly well:
- “Professional office with large windows and natural light”
- “Tropical beach at sunset with palm trees”
- “Modern minimalist living room with white walls”
- “Mountain landscape with snow-capped peaks and blue sky”
- “Cozy coffee shop with warm lighting”
- “Gradient background, soft blue to white”
- “Solid white background” (for product photos)
The Lighting Match
Here’s what makes Nano Banana special: it analyzes the lighting on your subject and adjusts the background lighting to match. If your subject is lit from the left, the generated background will have light coming from the left. This creates composites that look REAL, not pasted-on.
Real-World Test
I took a selfie I took in my messy kitchen (dirty dishes visible, bad fluorescent lighting) and replaced the background with “professional photography studio with soft lighting.” The result? My sister asked me when I’d gotten professional headshots taken.
The AI even adjusted the color temperature on my face to match the studio lighting. I literally didn’t ask it to do that. It just… understood.
Pro Tips for Background Replacement
- Be specific: “Beach” is good. “Tropical beach at golden hour with calm turquoise water and white sand” is better.
- Consider perspective: If your subject is shot from below, describe a background that makes sense from that angle.
- Mention lighting: “Overcast day,” “golden hour,” “harsh midday sun”—these details help the AI match your subject.
- Iterate: If the first result isn’t perfect, try slightly different prompts. The AI interprets language differently each time.
Feature #3: AI Object Removal (Goodbye, Photobombers)
This is the feature everyone wishes existed. The one where you remove that random stranger who walked into your perfect vacation photo. Or the trash can that ruined your otherwise gorgeous landscape shot. Or your ex from that group photo (we’ve all been there).
How It Works
Use the brush tool to paint over the object you want removed. Click “Remove,” and the AI fills in the space with contextually appropriate content. It looks at what’s around the object and generates pixels that blend seamlessly.
What I’ve Successfully Removed
- Strangers from vacation photos (obviously)
- Power lines from landscape shots
- Cars from street photography
- Acne and blemishes from portraits
- Dates and timestamps from old photos
- Watermarks (from your own photos, obviously)
- Trash cans, construction equipment, random poles
- Brace from landscape shots
- Ex-boyfriend from family photos (no judgment)
- My messy desk from video call screenshots
- Bird droppings from car photos (yes, really)
- Baby bottles from “aesthetic” home photos (parent life)
Size Doesn’t Matter
The tool handles both small objects (a coffee cup on a table) and large objects (an entire building in a landscape). For large removals, the results are still impressive, though you might need to make multiple passes for the cleanest result.
Real-World Test
I tested it on what I call the “impossible photo”—a crowded Times Square shot with dozens of people, vehicles, signs, and visual clutter. I tried to remove a large billboard from the background. The AI replaced it with a realistic building facade that matched the surrounding architecture perfectly.
Would a professional retoucher notice? Maybe, if they zoomed in to 400%. Would anyone else? Absolutely not.
Feature #4: AI Image Enhancement & Upscaling
Have old photos that are blurry, pixelated, or low-resolution? Nano Banana can make them look like they were shot with a modern camera.
Auto Enhancement
The “Enhance” feature analyzes your image and automatically corrects:
- Exposure – Brightens underexposed images, recovers blown highlights
- White balance – Corrects color casts (that annoying orange tint from indoor lighting)
- Contrast – Adds depth and dimension to flat-looking images
- Saturation – Makes colors pop without looking unnatural
- Sharpness – Crisp details without over-sharpening artifacts
- Noise reduction – Removes grain from high-ISO or low-light photos
- Haze removal – Cuts through fog, smog, and atmospheric haze
AI Upscaling (This One’s Incredible)
Traditional upscaling (making an image larger) makes things blurry. AI upscaling does the opposite—it actually ADDS detail that wasn’t there before.
Here’s how: Nano Banana’s AI has been trained on millions of high-resolution images. When you give it a small, low-quality image, it “imagines” what the missing detail should look like based on patterns it’s learned. The result is a larger image that looks genuinely sharp.
- 2x upscaling: Doubles image dimensions. Virtually perfect results.
- 4x upscaling: Quadruples dimensions. Excellent for most use cases.
- 8x upscaling: Massively increases resolution. Good for large prints.
Real-World Test
I found a 300×200 pixel thumbnail photo from 2005 (ancient by internet standards). I ran it through 4x upscaling. The result was a 1200×800 image that was genuinely sharp enough to use as a blog header. The AI reconstructed facial features, clothing details, and even the text on a sign in the background.
This is magical for anyone who has old family photos they want to preserve. Scan those photos, upload them to Nano Banana, and watch them come back to life.
Low-Light Enhancement
One of my favorite sub-features. Take a dark, grainy photo taken at night or in poor lighting. Click “Enhance Low Light.” The AI removes noise, brightens shadows, and recovers detail you didn’t know was there.
It’s like having night vision for your camera. Photos I thought were completely unusable came back looking like they were taken with a much better camera in better conditions.
Feature #5: AI Text-to-Image Generation
Beyond editing existing photos, Nano Banana can create entirely new images from text descriptions. This is where it competes with tools like Midjourney, DALL-E, and Stable Diffusion.
How It Works
Type a description of what you want to see, and the AI generates a completely new image. The more detailed your description, the closer the result matches your vision.
Example Prompts and Results
Prompt: “A cozy home office with a wooden desk, plants, warm lighting, and a laptop, photorealistic, shot on Canon EOS R5”
Result: A stunningly realistic image of a home office that looks like it was actually photographed. Every detail—wood grain, leaf texture, light bokeh—is photorealistic.
Prompt: “Professional product photo of a coffee mug on white background, studio lighting, commercial photography style”
Result: An image suitable for an e-commerce listing. Clean, professional, indistinguishable from actual product photography.
Prompt: “Watercolor painting of a golden retriever playing in autumn leaves, soft warm colors, artistic style”
Result: A beautiful watercolor-style artwork. Not photorealistic, but genuinely artistic and appealing.
Best Practices for Text-to-Image
- Be specific: Include subject, setting, style, lighting, camera angle, and mood
- Use style keywords: “Photorealistic,” “oil painting,” “anime style,” “cinematic,” “minimalist”
- Mention camera/lens: “Shot on iPhone 15 Pro,” “85mm portrait lens,” “wide angle landscape”
- Describe the mood: “Dramatic lighting,” “soft and dreamy,” “moody and dark”
- Iterate: Generate 4-5 versions and pick the best one, then refine from there
Use Cases
- Blog headers and featured images – Unique visuals for every article
- Social media content – Eye-catching posts that stop the scroll
- Product mockups – Visualize products before manufacturing
- Concept art – Rapid visualization of creative ideas
- Presentations – Custom images that match your exact message
- Marketing materials – Unique visuals without stock photo fees
Feature #6: AI Face Editing & Retouching
Portraits are where Nano Banana really shines. The face editing capabilities are both powerful and surprisingly natural-looking.
Available Face Editing Tools
1. Skin Smoothing
Removes blemishes, acne, scars, and uneven skin texture while preserving natural skin pores and details. Unlike old-school “beauty mode” that makes everyone look like a plastic doll, this maintains realistic skin texture. You look like a better version of yourself, not a different person.
2. Eye Enhancement
Brightens eyes, enhances iris color, removes red-eye, and adds subtle sparkle. You can adjust intensity from “barely noticeable” to “magazine cover dramatic.”
3. Teeth Whitening
One click whitens teeth naturally. No weird blue tint. No obvious editing. Just a brighter, more confident smile.
4. Age Adjustment
Want to see what you’ll look like in 20 years? Or what you looked like as a teenager? The age adjustment tool realistically ages or de-ages faces. It’s creepy how accurate it is.
5. Expression Changes
This one’s wild. You can subtly change facial expressions. Make a neutral face smile. Turn a frown into a laugh. Adjust the intensity for natural-looking results.
6. Lighting on Face
AI relighting changes the direction and quality of light on a face. Turn flat, boring lighting into dramatic studio lighting. Add golden hour warmth. Create rim lighting effects. All after the photo was taken.
7. Makeup Application
Virtually try different makeup looks. Natural, glam, smoky eye, bold lip—apply any style without touching an actual makeup brush. Great for makeup brands, beauty bloggers, or anyone who wants to experiment.
8. Background Blur (Bokeh)
Add professional-quality background blur that mimics expensive portrait lenses. Adjust blur intensity and shape (circular, hexagonal, cat-eye bokeh). Makes phone photos look like they were taken with a $3,000 camera and $2,000 lens.
Feature #7: AI Style Transfer & Artistic Effects
Turn any photo into a work of art. This feature alone is worth the price of the tool.
Preset Styles Available
- Oil Painting – Classic oil painting with visible brush strokes
- Watercolor – Soft, flowing watercolor effect
- Pop Art – Andy Warhol-inspired bold colors and patterns
- Japanese Ukiyo-e – Traditional Japanese woodblock print style
- Cubism – Picasso-inspired geometric fragmentation
- Impressionism – Monet-inspired soft, light-focused style
- Pixel Art – Retro video game aesthetic
- Pencil Sketch – Detailed pencil drawing effect
- Comic Book – Bold outlines and halftone dots
- 3D Render – CGI/claymation look
- Cyberpunk – Neon-lit futuristic style
- Film Noir – Black and white dramatic lighting
Custom Style Transfer
Beyond presets, you can upload a reference image and tell the AI to apply that style to your photo. Show it a Van Gogh painting, and your selfie gets the Van Gogh treatment. Show it a fashion magazine editorial, and your casual photo gets that high-end editorial look.
Real-World Test
I uploaded a photo of my dog sleeping on the couch. Applied the “Oil Painting” style. It now hangs framed in my living room and everyone who visits asks about the “beautiful painting.” Nobody guesses it’s a digitally transformed snapshot from my iPhone.
Feature #8: AI Product Photography (E-Commerce Game Changer)
If you sell anything online—on Amazon, eBay, Etsy, Shopify, Instagram, or anywhere else—this section might be the most valuable thing you read today.
The Problem with Product Photography
Professional product photography costs $50-500+ per photo. Lightbox setups cost $100-300. Learning to take good product photos takes months. And the results are often inconsistent.
Nano Banana’s Solution
Take a photo of your product with your phone. Upload it. Nano Banana will:
- Remove the background perfectly
- Correct lighting and shadows for a professional look
- Place the product on a clean white background (or any background you want)
- Generate lifestyle scenes showing the product in context
- Create multiple angles and compositions from a single photo
- Adjust colors to match the product’s true appearance
E-Commerce Platforms Supported
- Amazon: Meets all image requirements (white background, proper dimensions, no text)
- eBay: Optimized for eBay’s listing format
- Etsy: Lifestyle and product shots that stand out
- Shopify: Consistent product image galleries
- Instagram Shopping: Scroll-stopping product posts
- TikTok Shop: Dynamic product content
Real-World Test
My friend Jake sells handmade leather wallets on Etsy. He was spending $200 per photoshoot every time he added a new product. I had him take photos with his iPhone and run them through Nano Banana’s product photography feature.
The result? His new product listings look better than his old professional photos. He’s saved over $1,500 in the past three months. His conversion rate increased by 34% because the new photos look more appealing and consistent.
Feature #9: AI Image Extending (Outpainting)
This one sounds simple but is incredibly useful: AI can extend your image beyond its original borders.
How It Works
You have a photo that’s too tightly cropped. You wish there was more space around the subject. In the past, you’d be out of luck. With Nano Banana, you can expand any edge of your image, and the AI generates matching content to fill the new space.
Practical Uses
- Change aspect ratios: Turn a square Instagram photo into a landscape banner without cropping
- Add breathing room: A portrait that’s too tightly framed gets more background space
- Create wider landscapes: Extend a beautiful sunset photo to panoramic dimensions
- Social media adaptation: One image becomes perfectly sized for every platform
- Print preparation: Add margins needed for framing or mounting
Real-World Test
I had a portrait photo that was perfectly composed but I needed a horizontal version for a website banner. I extended the left and right sides by 50%. The AI generated matching background that was so seamless, I literally can’t tell where the original photo ends and the AI-generated content begins.
Feature #10: AI Batch Processing
Professional photographers often deal with hundreds or thousands of images from a single shoot. Nano Banana’s batch processing feature handles them all at once.
What You Can Batch Process
- Background removal for entire product catalogs
- Color correction across a full wedding shoot
- Upscaling hundreds of low-res images
- Watermarking with consistent placement
- Resizing for different platforms simultaneously
- Style transfer to create consistent brand aesthetics
- Noise reduction for high-ISO event photography
Real-World Test
I processed 200 product photos for an e-commerce client. Background removal + white background + color correction on all 200 images. Total time: 12 minutes. Previously, this same job took me an entire day in Photoshop.
The client was thrilled. I was thrilled. My back was thrilled (no more hunched over a computer for 8 hours straight).
Feature #11: Real Estate Photo Enhancement
If you’re in real estate, this section alone could transform your business.
What Nano Banana Does for Property Photos
- Sky replacement: Turn a cloudy, dreary sky into a beautiful blue sky with fluffy clouds
- Day-to-dusk conversion: Transform a daytime exterior shot into a stunning twilight photo with warm interior lights glowing
- Virtual staging: Add furniture and decor to empty rooms—looks completely real
- Decluttering: Remove personal items, clutter, and distracting objects from rooms
- Vertical correction: Fix converging vertical lines (that leaning building effect)
- Window pull: Balance interior and exterior exposure so windows show the outdoor view clearly
- Lawn enhancement: Make grass greener and more lush
- Pool enhancement: Make water look crystal-clear and inviting
The Impact on Listings
According to the National Association of Realtors, listings with professional-quality photos sell 32% faster and for 3-5% higher prices. Nano Banana gives every agent access to professional-quality photos without the $150-300 per listing cost.
Real-World Test
I helped a realtor friend enhance 15 listing photos. The transformation was dramatic—one listing went from having the worst photo in the neighborhood to having the best. She got 40% more online views in the first week and sold the house $15,000 over asking price.
Her cost? A monthly Nano Banana subscription. The ROI was insane.
Feature #12: AI Photo Restoration (Fix Old & Damaged Photos)
Got old family photos that are scratched, faded, torn, or damaged? Nano Banana can bring them back to life.
Restoration Capabilities
- Scratch removal: Eliminates scratches, dust, and marks
- Tear repair: Reconstructs torn or creased areas
- Faded color recovery: Restores colors to faded photos
- Black & white colorization: Adds realistic color to B&W photos
- Resolution enhancement: Sharpens and upscales old, low-res scans
- Missing section reconstruction: AI can fill in missing parts of damaged photos
Emotional Impact
I restored a photo of my grandmother from 1962. It was scratched, faded, and had a water stain across the bottom. After Nano Banana restoration, it looked like it was taken yesterday. I gave it to my mom for her birthday. She cried. Good tears. The kind that come when you see someone you loved clearly for the first time in decades.
This feature isn’t just about pixels. It’s about preserving memories.
Feature #13: AI Content-Aware Fill
Similar to object removal, but smarter. Content-aware fill doesn’t just erase—it INTUITIVELY recreates what should be there.
Practical Examples
- Extending a pattern: Have a photo of wallpaper? AI can extend the pattern seamlessly to any size
- Filling empty spaces: Crop someone out of a group photo and the AI fills in the missing background perfectly
- Completing partial objects: Photo cut off at the edge? AI extends the object naturally
- Removing text: Remove watermarks, signs, or text overlays while preserving the background
- Fixing cropped heads: Yes, it can literally reconstruct the top of someone’s head that was cropped out
Feature #14: AI Color Grading & Film Emulation

Want your photos to look like they were shot on specific film stocks or directed by a famous cinematographer? Nano Banana’s AI color grading makes it effortless.
Film Stock Emulations
- Kodak Portra 400 – Warm, creamy skin tones (the portrait photographer’s favorite)
- Fuji Superia 400 – Vibrant greens and punchy colors
- Kodak Ektar 100 – Ultra-saturated, vivid colors
- Ilford HP5 – Classic black and white with beautiful grain
- CineStill 800T – Cinematic, teal-and-orange Hollywood look
- Fuji Velvia 50 – Landscape-optimized saturated colors
Cinematic Looks
-
>
- Teal & Orange – The “Hollywood blockbuster” color scheme
- Blade Runner 2049 – Moody, desaturated with warm highlights
- Wes Anderson – Pastel, symmetrical, quirky color palettes
- Wong Kar-wai – Rich, saturated, neon-lit aesthetics
- Christopher Nolan – High contrast, desaturated, dramatic
Custom Color Grading
Type natural language descriptions like “make it warm and golden,” “desaturate everything except reds,” or “add a vintage fade effect” and the AI understands and applies the changes.
Feature #15: AI Watermarking & Copyright Protection
Protecting your images is crucial. Nano Banana offers intelligent watermarking that’s both visible enough to deter theft and subtle enough to not ruin the viewing experience.
Watermark Options
- Text watermark: Your name, brand, or copyright notice
- Logo watermark: Upload your logo for professional branding
- Tile watermark: Repeated pattern across the entire image
- Invisible watermark: Hidden digital signature that proves ownership without visible marks
- Smart placement: AI suggests optimal watermark position that’s hard to crop out
Invisible Watermark Technology
The invisible watermark uses AI to embed ownership information into the image data itself. Even if someone crops, resizes, or filters the image, the watermark survives. You can prove ownership by running the image through Nano Banana’s watermark detector.
Feature #16: AI Background Blur & Bokeh Effects
That creamy, blurry background that makes professional portraits look so incredible? It’s called “bokeh,” and it traditionally requires expensive cameras with fast lenses ($2,000-5,000+). Nano Banana recreates it from any photo.
Bokeh Types Available
- Circular bokeh – Classic round blur points (like Canon L-series lenses)
- Hexagonal bokeh – Slightly angular (like Nikon lenses)
- Anamorphic bokeh – Cinematic horizontal streaks (like movie cameras)
- Heart-shaped bokeh – Fun and whimsical (popular for engagement photos)
- Cat-eye bokeh – Oval shapes at image edges (vintage lens effect)
Adjustable Parameters
- Blur intensity: From subtle to extreme
- Subject detection accuracy: How precisely the AI identifies what should be sharp
- Transition smoothness: How gradually the blur transitions from sharp to blurry
- Depth simulation: How the AI creates a sense of depth in the blur
This feature single-handedly makes phone photos look like they were taken with a professional camera. I tested it on a portrait taken with an iPhone 14. Applied bokeh at 60% intensity. My photographer friend asked what lens I’d used. When I told him it was a phone photo with AI bokeh, he didn’t believe me for five minutes.
Feature #17: AI Image Comparison & Before/After Sharing
Nano Banana includes built-in tools for creating before/after comparisons—essential for social media content and client presentations.
Sharing Options
- Side-by-side comparison: Classic before/after layout
- Slider comparison: Interactive slider that reveals the edit (great for websites)
- Before/after video: Animated transition between original and edited versions
- Edit history: Shows every step of the editing process (great for tutorials)
- One-click social sharing: Direct export to Instagram, Facebook, Twitter, Pinterest
For photographers building a social media presence, these comparison tools are invaluable for demonstrating your skills and attracting new clients.
Complete Tutorial: Edit a Photo from Start to Finish
Let me walk you through a real editing workflow so you can see how all these features work together.
Scenario: You took a casual selfie at a barbecue. You want to use it as your LinkedIn profile photo.
Step 1: Upload the photo
Drag your selfie into Nano Banana. It’s probably got bad lighting, a messy background, and maybe some food on your shirt (it was a barbecue, after all).
Step 2: Remove the background
Click “Remove Background.” In 3 seconds, your face and upper body are cleanly isolated with a transparent background.
Step 3: Add a professional background
Type: “Professional office setting with soft natural lighting from windows, blurred background, warm tones.” The AI generates a background that makes you look like you work in a fancy office.
Step 4: Enhance the face
Click “Enhance Face” and adjust the sliders:
- Skin smoothing: 40% (subtle but effective)
- Eye enhancement: 30% (brighter, more alert)
- Teeth whitening: 25% (natural-looking)
- Facial lighting: Adjust to simulate studio lighting from the upper left
Step 5: Color correct
Click “Auto Enhance” for overall color correction. The barbecue lighting is now gone—skin tones look natural, colors are balanced, and exposure is correct.
Step 6: Crop for LinkedIn
Use the crop tool to select LinkedIn’s recommended dimensions (400×400 for profile photo, or 1584×396 for banner).
Step 7: Add subtle background blur
Apply 25% background blur to create depth and keep the focus on your face.
Step 8: Export
Download in high resolution. Upload to LinkedIn. Watch the connection requests roll in.
Total editing time: Under 5 minutes. In Photoshop, this same workflow would take 30-45 minutes for a skilled editor.
Nano Banana vs. The Competition
Let’s be fair and compare Nano Banana to other popular tools:
Nano Banana vs Adobe Photoshop
- Photoshop wins: More precise control, industry standard, infinite customization
- Nano Banana wins: Speed (10-50x faster), ease of use, lower learning curve, better for non-designers
- Verdict: For 90% of photo editing tasks, Nano Banana is faster and easier. Photoshop is still king for complex, precision work.
Nano Banana vs Canva
- Canva wins: Better template library, more design tools for non-photography needs
- Nano Banana wins: Superior photo editing AI, better background removal, higher quality output
- Verdict: Canva for graphic design, Nano Banana for photo editing. They complement each other perfectly.
Nano Banana vs Remove.bg
- Remove.bg wins: Simpler for one task (background removal only)
- Nano Banana wins: Does everything Remove.bg does PLUS a hundred other things
- Verdict: No contest. Nano Banana replaces Remove.bg and then some.
Nano Banana vs Midjourney
- Midjourney wins: More artistic/creative image generation, larger community
- Nano Banana wins: Photo EDITING (Midjourney generates new images but can’t edit existing ones effectively)
- Verdict: Different tools for different purposes. Use Midjourney to create, Nano Banana to edit.
Nano Banana vs Luminar Neo
- Luminar wins: More photography-specific tools, better raw processing, desktop app performance
- Nano Banana wins: More AI features, cloud-based (access anywhere), better text-to-image, better batch processing
- Verdict: Luminar for dedicated photographers, Nano Banana for everyone else.
Pricing Breakdown: Is It Worth It?
Free Tier
- Limited credits per month
- Basic features (background removal, enhancement)
- Watermark on outputs
- Lower resolution exports
- Great for testing and casual use
Pro Plan
- Unlimited credits
- All features unlocked
- No watermark
- Full resolution exports
- Priority processing (faster results)
- Batch processing
- API access
- Priority customer support
Is It Worth the Price?
Let’s do the math. A single professional photo editing session costs $50-200. Professional background removal costs $3-5 per image. A Photoshop subscription costs $22/month. AI upscaling services cost $5-10 per image.
If you edit more than a few images per month, Nano Banana pays for itself almost immediately. And unlike Photoshop, you don’t need to spend months learning how to use it.
My honest assessment: For casual users, the free tier is probably enough. For anyone who edits photos regularly for work, the Pro plan is a no-brainer. The ROI is immediate.
10 Professional Tips & Tricks Most Users Don’t Know
Here are some hidden gems and power-user techniques I’ve discovered through extensive testing:
1. Use Reference Images for Consistency
When generating backgrounds or style transfers, upload a reference image alongside your text prompt. This gives the AI a visual example to work from, producing much more consistent and accurate results.
2. Layer Multiple Edits
Don’t try to do everything in one step. Remove background first, then enhance, then color grade, then add effects. Each step builds on the previous one, and you maintain more control over the final result.
3. Use the “Undo” History as a Comparison Tool
After making several edits, click through the undo history to compare your current version with previous states. Sometimes the intermediate version actually looks better than the “finished” one.
4. Start with Lower Settings
When using enhancement features, start at 50% intensity. See how it looks. Increase gradually. It’s easier to add more effect than to remove over-processing.
5. Batch Similar Photos Together
When processing multiple photos from the same shoot, edit one first to get your settings perfect, then apply those same settings to the batch. This ensures consistency across the set.
6. Use Specific Camera References in Text Prompts
Type “shot on Canon EOS R5 with 85mm f/1.4 lens” instead of just “professional photo.” The AI understands camera characteristics and will generate more realistic results.
7. Combine AI with Manual Touch-Ups
Use Nano Banana for 90% of the work, then export and do final tweaks in a simpler tool if needed. The AI handles the heavy lifting, you handle the fine-tuning.
8. Save Your Favorite Presets
When you nail a particular combination of settings, save it as a custom preset. Apply it to future images with one click for consistent branding.
9. Use Negative Prompts
When generating images, tell the AI what you DON’T want: “NOT cartoon style,” “NO text,” “WITHOUT people.” Negative prompts help refine results significantly.
10. Check the “Alternatives”
After every AI operation, Nano Banana shows alternative versions. Always scroll through them. The “best” result isn’t always the first one shown.
Common Mistakes to Avoid
- Over-editing: The most common mistake. If you can tell an image has been edited, you’ve gone too far. Subtlety is key.
- Ignoring original quality: AI enhancement can’t fix everything. A completely out-of-focus photo will still be somewhat blurry after enhancement.
- Using AI generation for deceptive purposes: Don’t create fake images to mislead people. It’s unethical and potentially illegal.
- Forgetting to check hands and fingers: AI-generated images sometimes get hands wrong. Always check and fix if needed.
- Not maintaining aspect ratios:
- Exporting at wrong resolution: Match your export settings to your intended use (web vs. print).
- Not backing up originals: Always keep the original file untouched. You might want to start over.

The Future of Nano Banana: What’s Coming Next
The development team has hinted at several upcoming features:
- Video editing: Apply all these features to video clips, not just photos
- 3D photo creation: Convert 2D photos into 3D images for VR/AR
- Real-time editing: Edit photos live during video calls
- AR try-on: Virtual try-on for fashion, makeup, and accessories
- Smart cropping: AI that knows exactly how to crop for each social platform
- Team collaboration: Multiple editors working on the same image simultaneously
The pace of AI development means these features could arrive within months, not years. Staying on top of Nano Banana updates means staying ahead of the curve.
Final Verdict: Should You Use Nano Banana?

After spending weeks testing every feature, running hundreds of images through the tool, and comparing results to industry-standard software, here’s my final assessment:
Who Should Use Nano Banana Immediately:
- Small business owners who need professional photos without professional budgets
- Social media managers who need to create content quickly and consistently
- E-commerce sellers who want product photos that convert
- Real estate agents who want listings that stand out
- Casual users who want their personal photos to look amazing
- Content creators who need unique visuals for every post
Who Should Use It as a Companion Tool:
- Professional photographers – Use for rapid editing, then fine-tune in Lightroom/Photoshop
- Graphic designers – Use for image manipulation, then compose in Illustrator/InDesign
- Video editors – Use for thumbnail creation and still frame editing
The Bottom Line:
Nano Banana is the most impressive AI image editing tool I’ve tested. It’s not perfect—no tool is. There are edge cases where it struggles (very complex composites, highly technical retouching, etc.). But for the vast majority of image editing tasks that regular people and most professionals need to do, it’s faster, easier, and often produces better results than traditional tools.
We’re living in a golden age of AI-powered creative tools. Nano Banana is leading the charge in photo editing. If you haven’t tried it yet, you’re missing out.
Go sign up for the free tier. Upload your worst photo. Watch the AI work its magic. And prepare to rethink everything you thought you knew about photo editing.
Trust me. I did. And I’m never going back.
Frequently Asked Questions
Is Nano Banana free to use?
Yes, there’s a free tier with limited credits and features. It’s enough to test the tool and handle occasional edits. For unlimited use and all features, there’s a paid Pro plan.
Do I need a powerful computer to use it?
No! Nano Banana is cloud-based, meaning all the heavy processing happens on their servers. You can use it from any device with a web browser—a Chromebook, an old laptop, even a smartphone.
Is it better than Photoshop?
For most common editing tasks—yes, in terms of speed and ease of use. Photoshop still wins for precision work and advanced compositing. They’re complementary tools, not direct replacements.
Can I use edited images commercially?
Yes. Images you create or edit with Nano Banana are yours to use commercially. Check the terms of service for specific details about AI-generated content.
How does it handle privacy?
Uploaded images are encrypted and processed on secure servers. Most plans include automatic deletion of images after processing. Check their privacy policy for complete details.
Does it work on mobile?
Yes! Nano Banana works on any device with a web browser, including iPhones, Android phones, and tablets. There are also dedicated apps for iOS and Android.
What image formats does it support?
Input: JPEG, PNG, WEBP, TIFF, BMP, HEIC, RAW (most formats). Output: JPEG, PNG, WEBP, TIFF. PNG supports transparency for background removal.
Is there an API for developers?
Yes, Pro plans include API access for integrating Nano Banana’s features into your own applications, websites, or workflows.
Can it edit video?
Not yet, but video editing is in development and expected to launch later in 2024.
How accurate is the AI?
For most tasks, accuracy is 90-98%. Background removal is near-perfect. Object removal is excellent. Face editing is natural-looking. Edge cases (very complex scenes, unusual objects) may require manual adjustment.
Does it work offline?
No, Nano Banana requires an internet connection since processing happens in the cloud. However, this also means it works on any device regardless of processing power.
Can I undo changes after exporting?
If you have a Pro account, your edit history is saved. You can go back and re-export with different settings. Always keep your original files as backup.
Resources & Links
Official Resources
Learning Resources
- YouTube Tutorials – Search “Nano Banana tutorial” for video guides
- Reddit r/Photography – Community discussions and tips
- Udemy Courses – In-depth video courses on AI photo editing
Related AI Tools Worth Exploring
- Midjourney – AI art generation
- Canva – Graphic design with AI features
- Luminar Neo – AI-powered photo editor
- Clipdrop – AI image tools
- Topaz Labs – AI upscaling and enhancement